
I saw this darling earring tutorial the other day on Pitter & Glink & decided I wanted to make a little bigger version & make the little hearts into a garland.
What not another garland tutorial! Really why not? I'm stating here & now that garlands will never go out of style. Sure certain styles might get a little old but let's face it- garlands are adorable & they get the decorating done! So on that note here's ANOTHER garland tutorial....

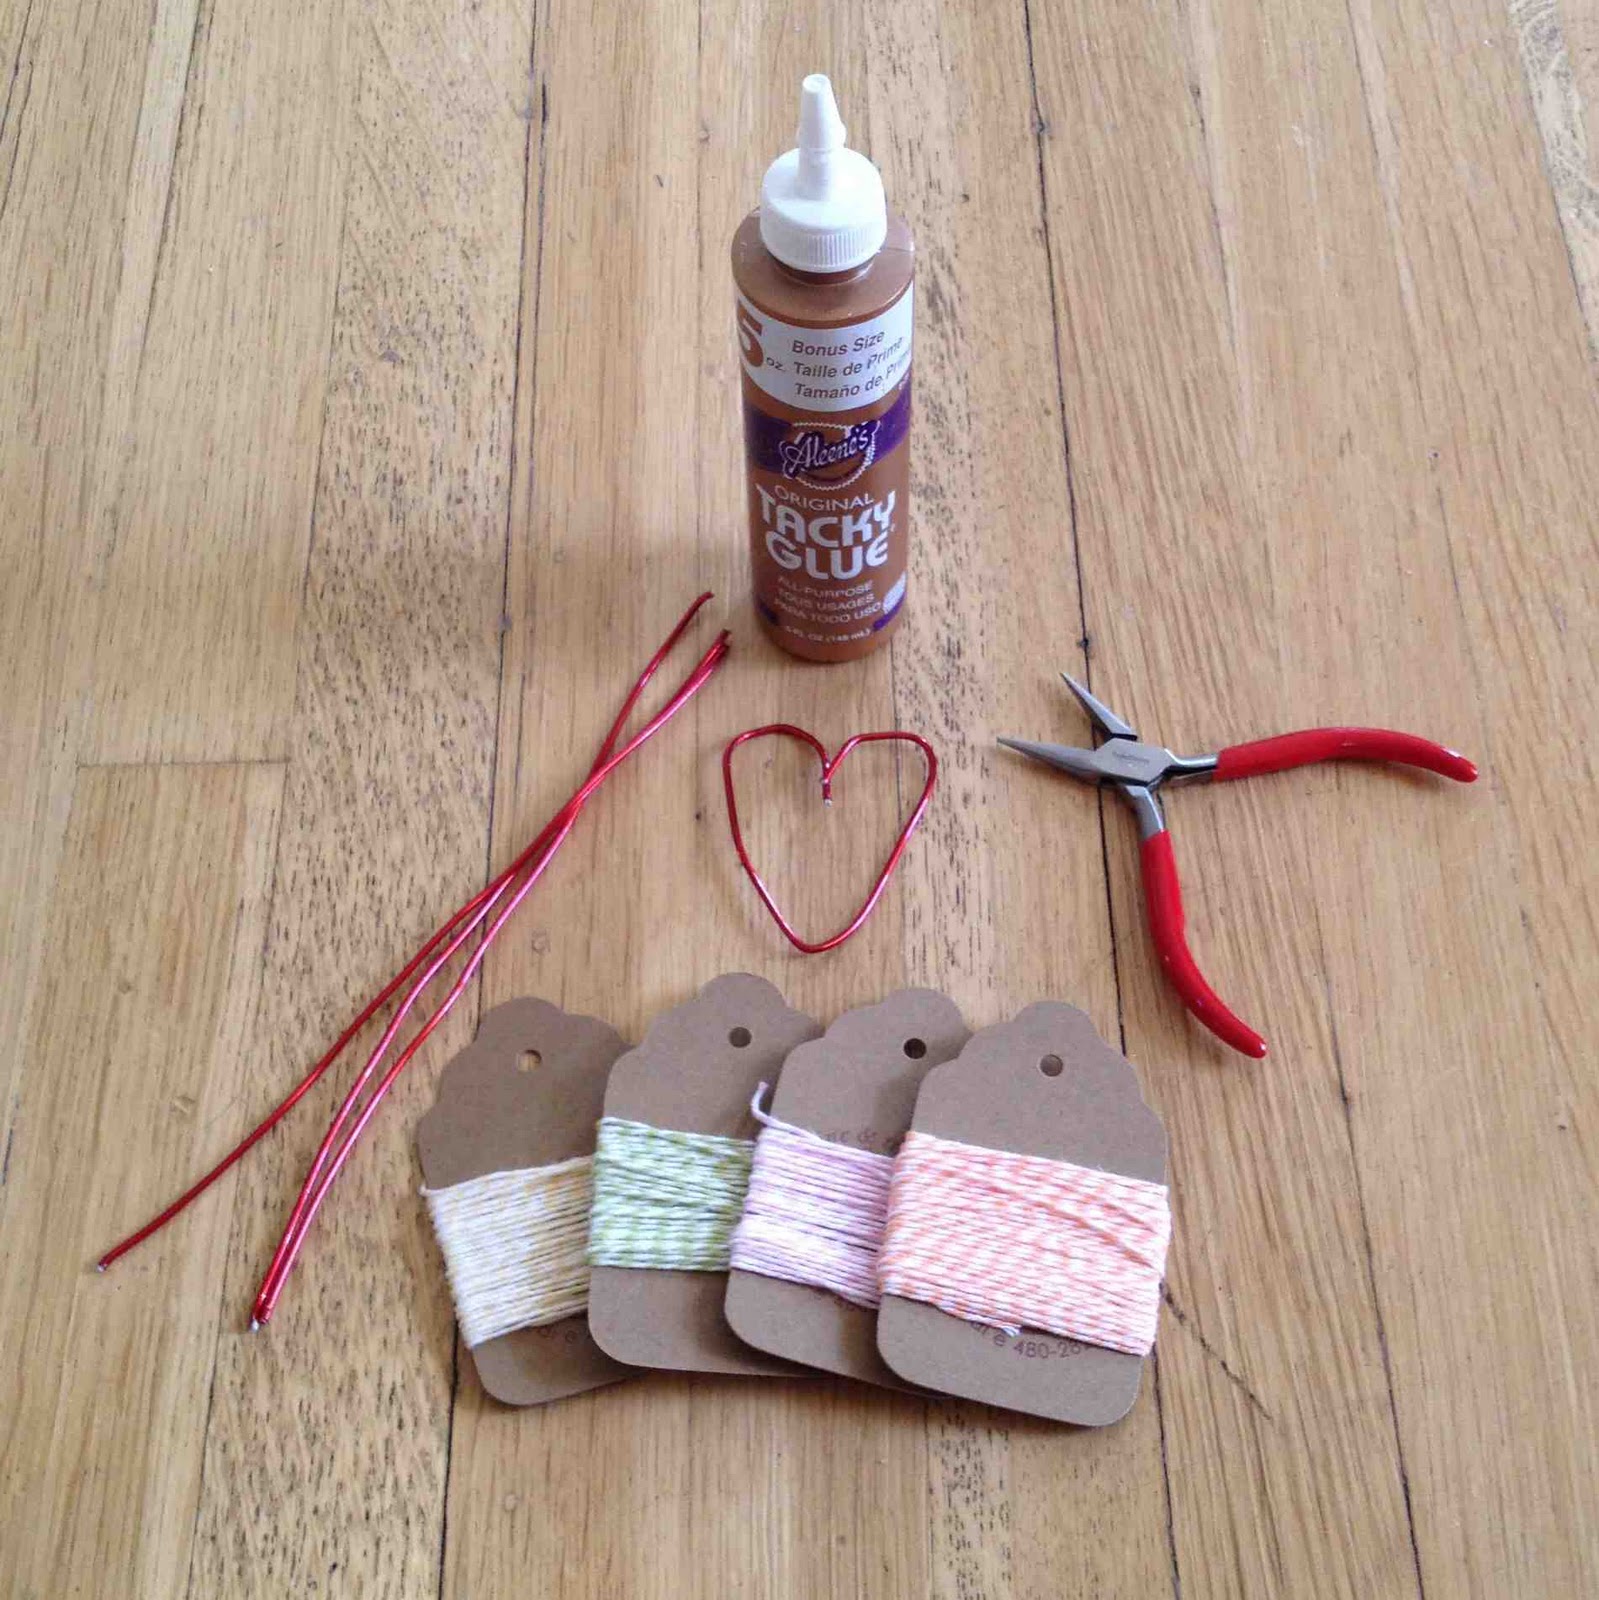
What You'll Need & Step 1
flower wire
tacky glue
bakers twine I'm using all different colors {or a heavy-ish embroidery thread}
pliers
{& I guess you'll need scissors if you don't like using your teeth}
1 ~ cut your wires the same length - mine are about 6 inches long
2 ~ squeeze a little glue onto a piece of paper
3 ~ spread the glue onto your wire about half way down
4 ~ roll the twine around the wire re-gluing & re-twining until
this is me leaving a 1/2 inch free
5 ~ bend your wire in the middle to start forming your heart
6 ~ I measured with my finger where I wanted the tops to bend so I
could get all of the hearts to be about the same size
7 ~ use pliers to manipulate the wires to be straight next to
8 ~ add more glue
9 ~ wrap the twine around the 2 ends to cover the wire
10 ~ squeeze some glue onto the outside of the heart
spread the glue around with your finger
11 ~ start wrapping the twine around in all different directions
make sure the twine is touching glue where ever it wraps -
12 ~ pick a strong area on the twine & tie a knot around it -
make sure to pull the knot tight & then do it again to make
13 ~ cut the extra twine off
14 ~ put a dab of glue on the knot to keep it super secure-


* check out some of my other Valentines Day diy's here, here, here, here, here
What not another garland tutorial! Really why not? I'm stating here & now that garlands will never go out of style. Sure certain styles might get a little old but let's face it- garlands are adorable & they get the decorating done! So on that note here's ANOTHER garland tutorial....

What You'll Need & Step 1
flower wire
tacky glue
bakers twine I'm using all different colors {or a heavy-ish embroidery thread}
pliers
{& I guess you'll need scissors if you don't like using your teeth}
1 ~ cut your wires the same length - mine are about 6 inches long
{I cut 6 but ended up making 7 hearts}
2 ~ squeeze a little glue onto a piece of paper
{not too much because tacky glue dries pretty quickly}

3 ~ spread the glue onto your wire about half way down
{you'll leave about a 1/2 inch of both of the ends glue & twine free for now}

4 ~ roll the twine around the wire re-gluing & re-twining until
you hit the end- remember to leave a 1/2 inch free of glue & twine

this is me leaving a 1/2 inch free

5 ~ bend your wire in the middle to start forming your heart

6 ~ I measured with my finger where I wanted the tops to bend so I
could get all of the hearts to be about the same size
{yes I do this a lot- these old creasy fingers are good for something...}

7 ~ use pliers to manipulate the wires to be straight next to
each other for the next part

8 ~ add more glue

9 ~ wrap the twine around the 2 ends to cover the wire
& hook the pieces together

10 ~ squeeze some glue onto the outside of the heart

spread the glue around with your finger

11 ~ start wrapping the twine around in all different directions
making sure to pull tightly while you're wrapping

make sure the twine is touching glue where ever it wraps -
add glue as needed

12 ~ pick a strong area on the twine & tie a knot around it -
use pliers or something to help you pull the twine through
the tight spots

make sure to pull the knot tight & then do it again to make
it a double knot

13 ~ cut the extra twine off

14 ~ put a dab of glue on the knot to keep it super secure-
now do this again 5- 6 more times!


take a look at your work & smile cause they are super cute!
then frown cause you feel like you need one more to make it super duper cute
{yep I said super duper}


15 ~ measure your garland twine- {I made mine about 1 1/2 yards long}
then measured 4 1/2 inches between each heart tying the garland twine
onto the tops of the hearts tops
{I was only going to tie the garland twine to one of the heart tops but ended up
tying it to both tops- sorry not pictured}

* check out some of my other Valentines Day diy's here, here, here, here, here


